Microsoft Copilot Studio集成Midjourney绘画
Microsoft Copilot Studio 原来叫做Power Virtual Agents ,可以用来搭建机器人Bot。通过Power Automate 来实现调用Midjourney来实现一个简单的Midjourney机器人。
搭建Midjourney Api
Midjourney本身是没有提供api接口的,所以需要利用第三方来实现api。当然也可以通过代理discord自己创建api接口。
https://github.com/novicezk/midjourney-proxy (Docker安装,方便部署,开源版功能受限,但也够用)
https://github.com/webman-php/midjourney-proxy (PHP版本, 支持Midjourney所有功能,稳定)
此次就选择第一种来演示,毕竟docker方便点,
docker run -d --name midjourney-proxy \
 -p 8080:8080 \
 -e mj.discord.guild-id=xxx \
 -e mj.discord.channel-id=xxx \
 -e mj.discord.user-token=xxx \
 -e mj.discord.user-agent="Mozilla/5.0 (Windows NT 10.0; Win64; x64) AppleWebKit/537.36 (KHTML, like Gecko) Chrome/117.0.0.0 Safari/537.36" \
 -e mj.api-secret=xxx \
 -e mj.discord.timeout-minutes=30 \
novicezk/midjourney-proxy:2.5.5获取用户Token、服务器ID、频道ID:获取方式
其中mj.api-secret自己编一个,防止别人盗用你的接口
安装完后访问访问 http://ip:port/mj 可查看API文档
Copilot Studio搭建机器人
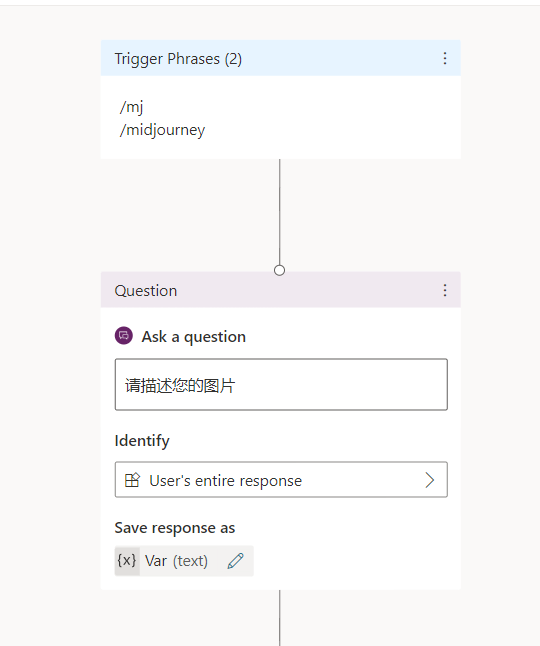
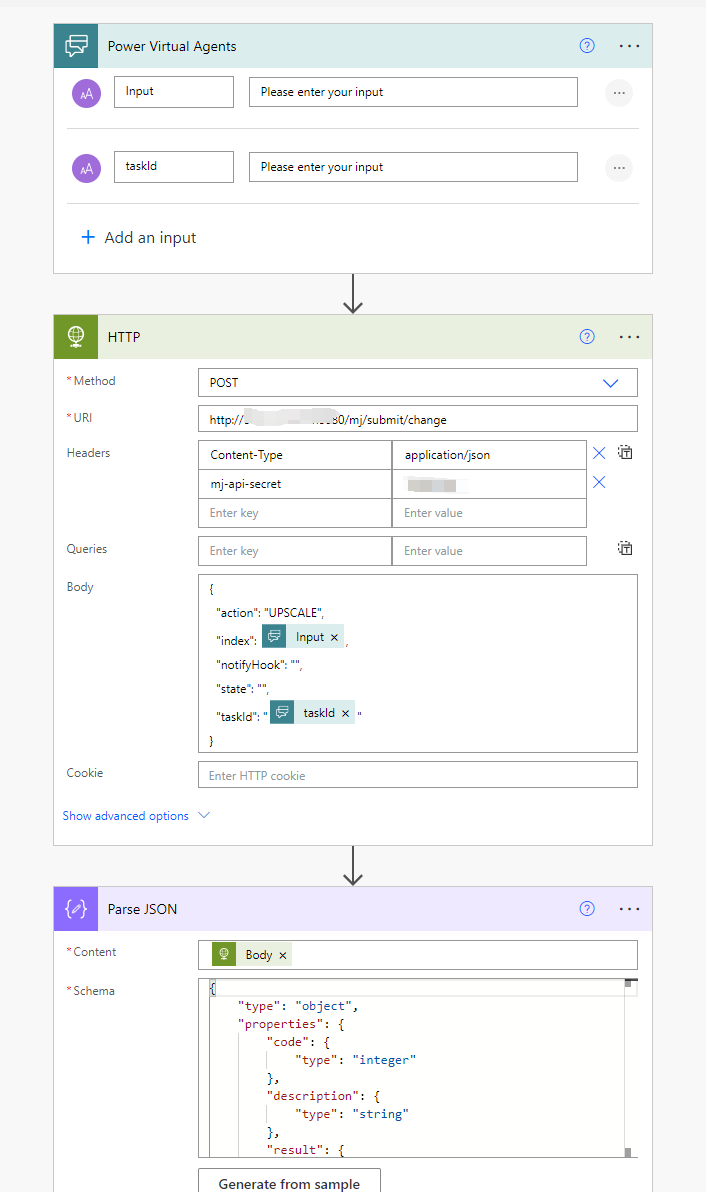
打开Copilot Studio, 在Topics里创建一个New topics
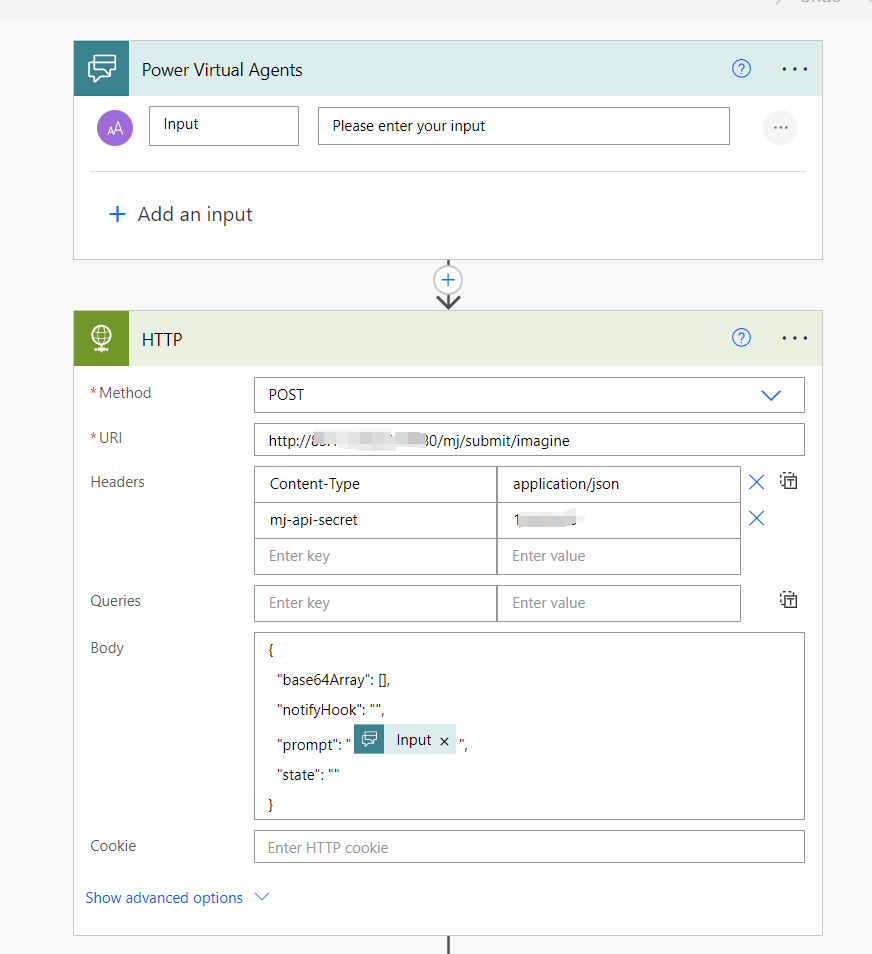
添加触发词后调用提问,将用户的回答保存到Var里。
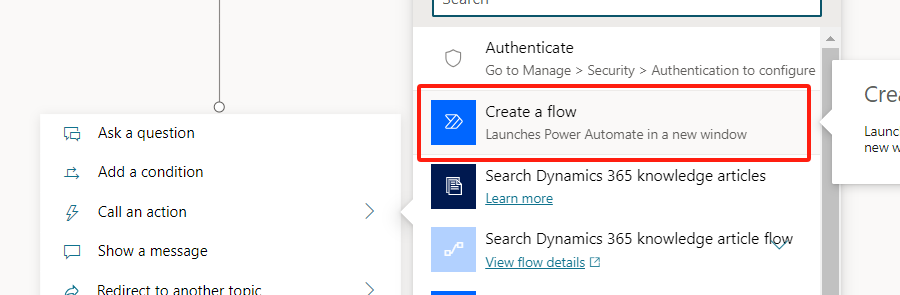
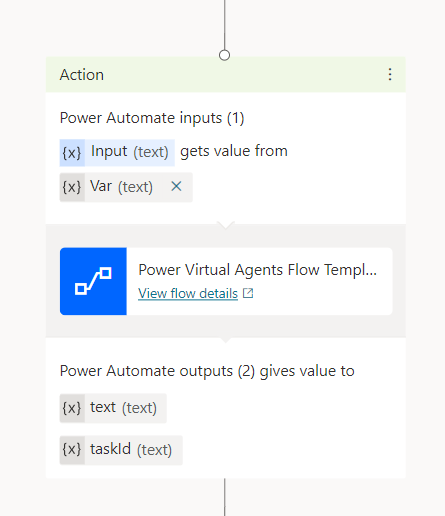
通过调用action用power automate 创建一条流
将用户的答复var赋值到input里。
接着转到power automate这里,调用HTTP来请求接口。
接着匹配返回的json数据
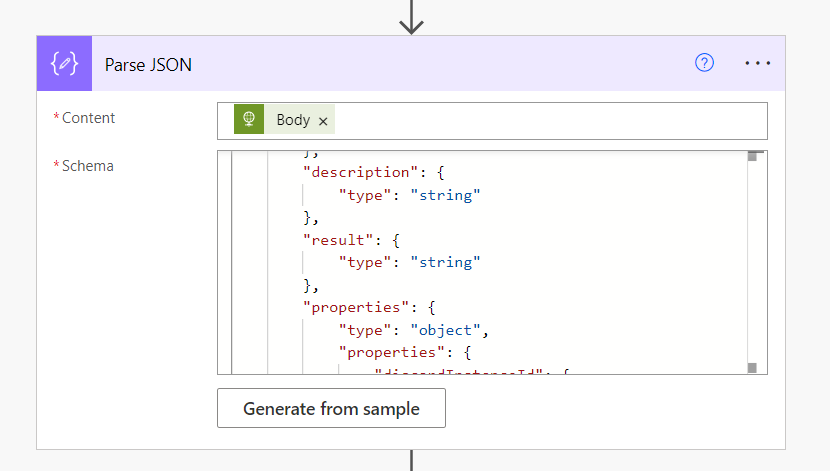
{
"type": "object",
"properties": {
"code": {
"type": "integer"
},
"description": {
"type": "string"
},
"result": {
"type": "string"
},
"properties": {
"type": "object",
"properties": {
"discordInstanceId": {
"type": "string"
}
}
}
}
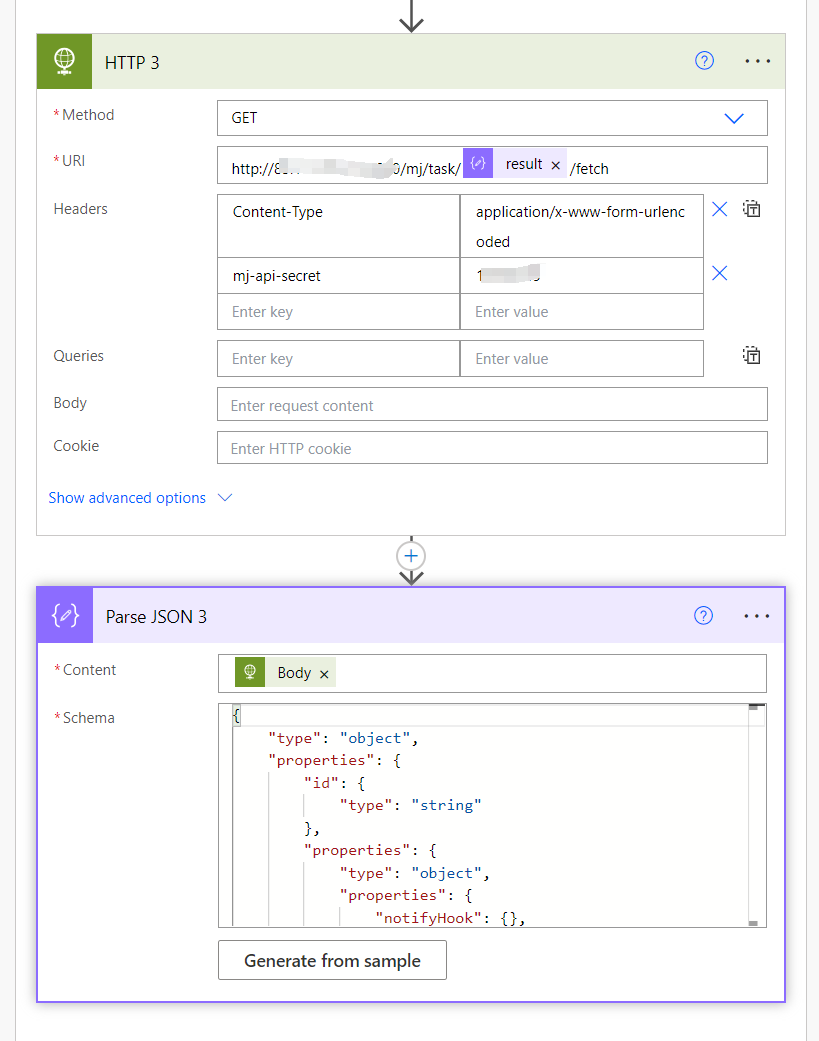
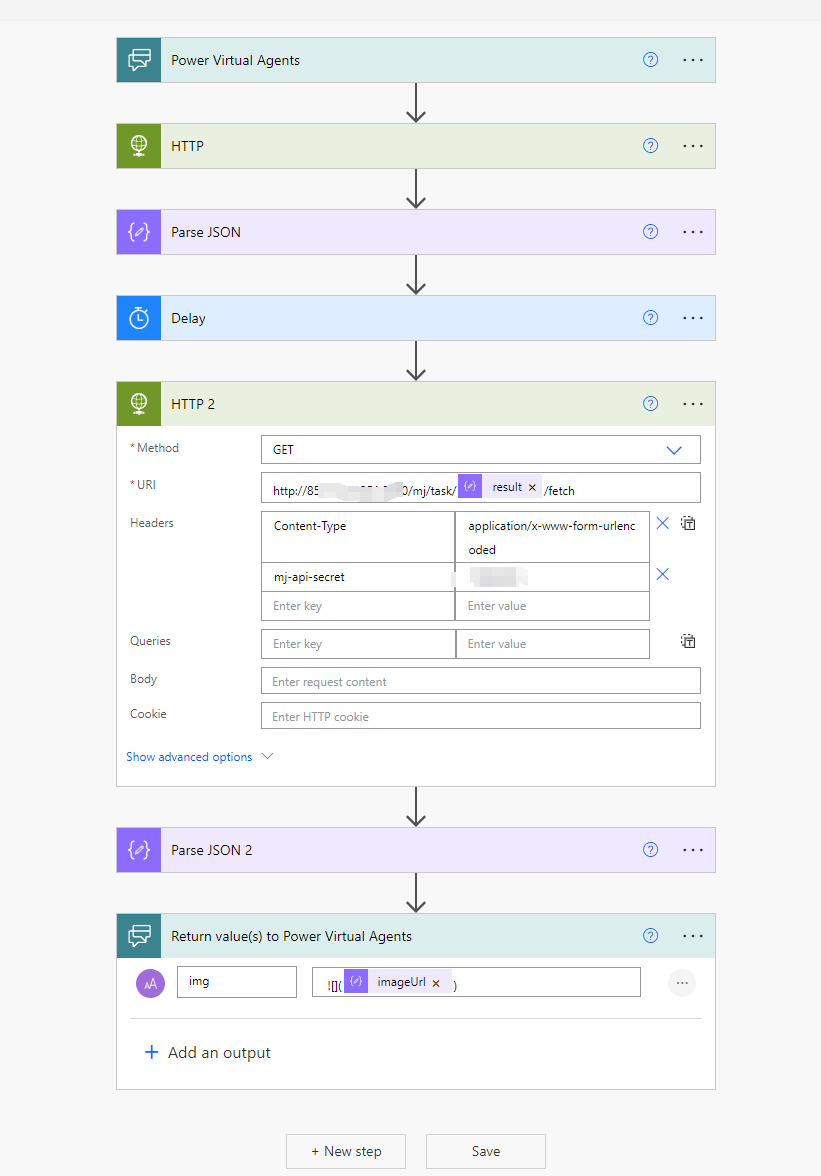
}再次HTTP请求,获取任务来得到具体的图像
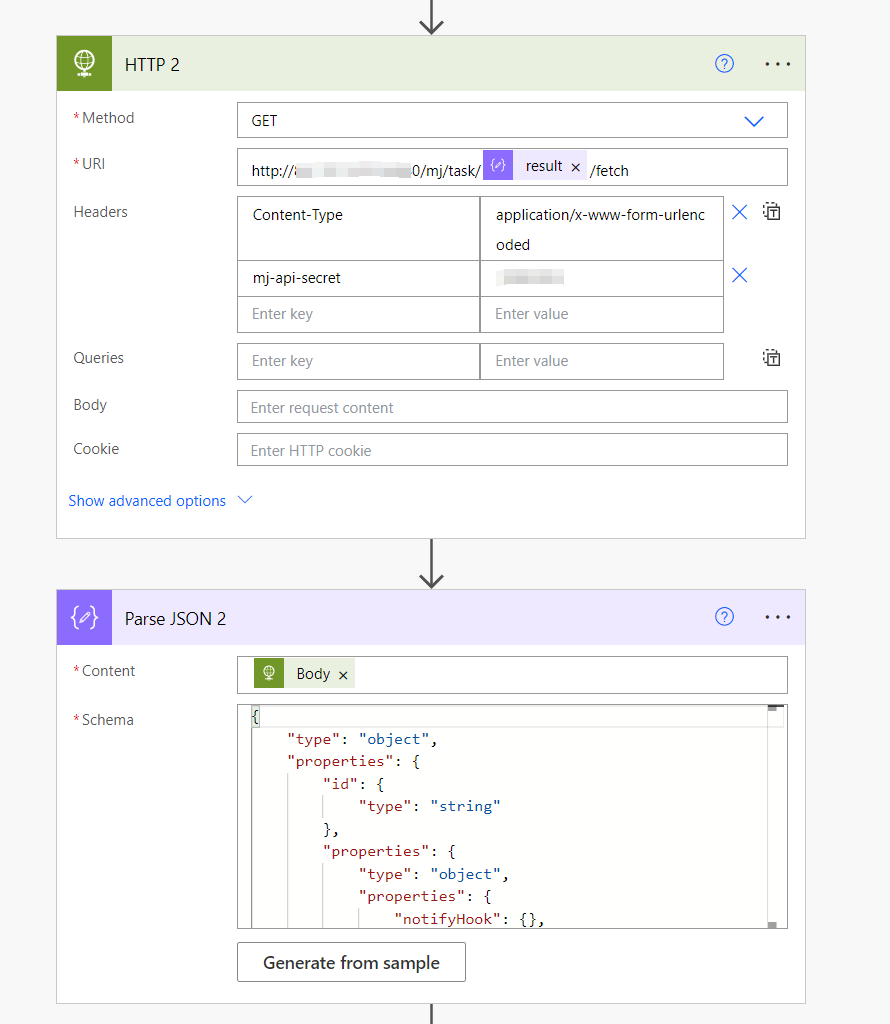
{
    "type": "object",
    "properties": {
        "id": {
            "type": "string"
        },
        "properties": {
            "type": "object",
            "properties": {
                "notifyHook": {},
                "discordInstanceId": {
                    "type": "string"
                },
                "nonce": {
                    "type": "string"
                }
            }
        },
        "action": {
            "type": "string"
        },
        "status": {
            "type": "string"
        },
        "prompt": {
            "type": "string"
        },
        "promptEn": {
            "type": "string"
        },
        "description": {
            "type": "string"
        },
        "state": {
            "type": "string"
        },
        "submitTime": {
            "type": "integer"
        },
        "startTime": {},
        "finishTime": {},
        "imageUrl": {},
        "progress": {},
        "failReason": {}
    }
}
循环等待结果
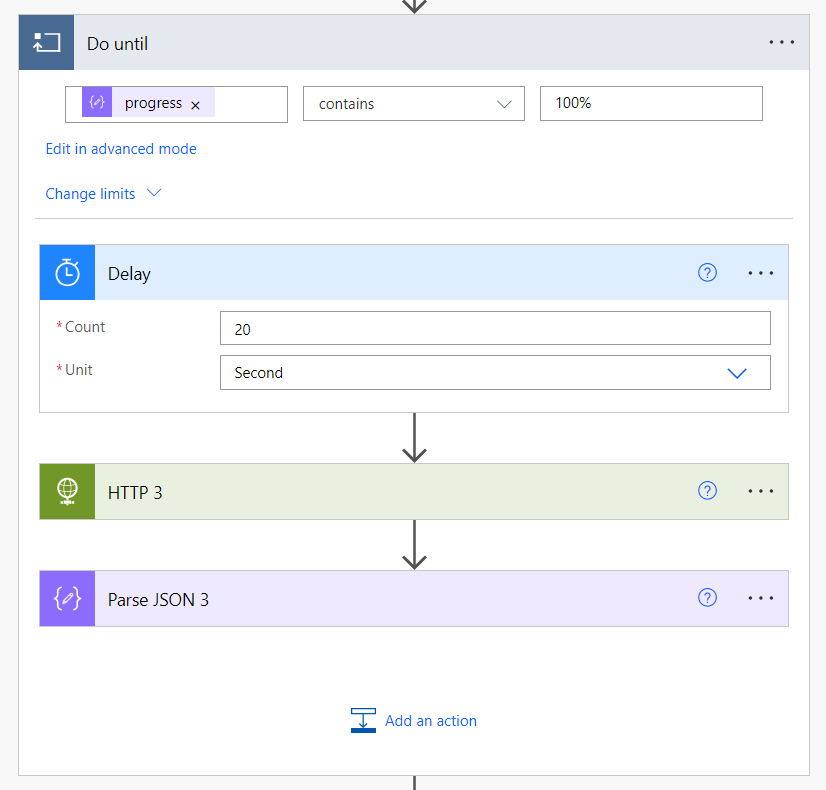
{
    "type": "object",
    "properties": {
        "id": {
            "type": "string"
        },
        "properties": {
            "type": "object",
            "properties": {
                "notifyHook": {},
                "discordInstanceId": {
                    "type": "string"
                },
                "nonce": {
                    "type": "string"
                }
            }
        },
        "action": {
            "type": "string"
        },
        "status": {
            "type": "string"
        },
        "prompt": {
            "type": "string"
        },
        "promptEn": {
            "type": "string"
        },
        "description": {
            "type": "string"
        },
        "state": {
            "type": "string"
        },
        "submitTime": {
            "type": "integer"
        },
        "startTime": {},
        "finishTime": {},
        "imageUrl": {},
        "progress": {},
        "failReason": {}
    }
}
返回图片url, 需要用到markdown来渲染图片。
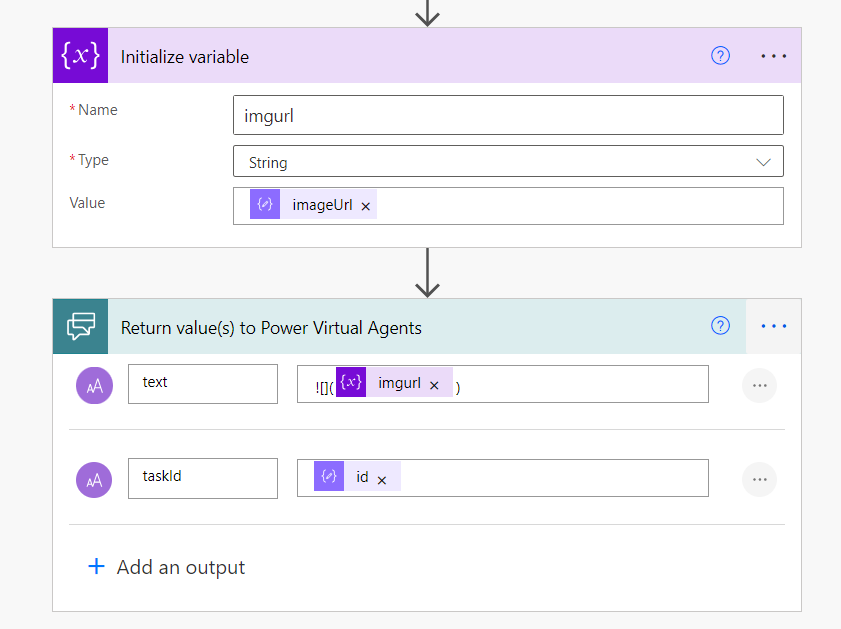
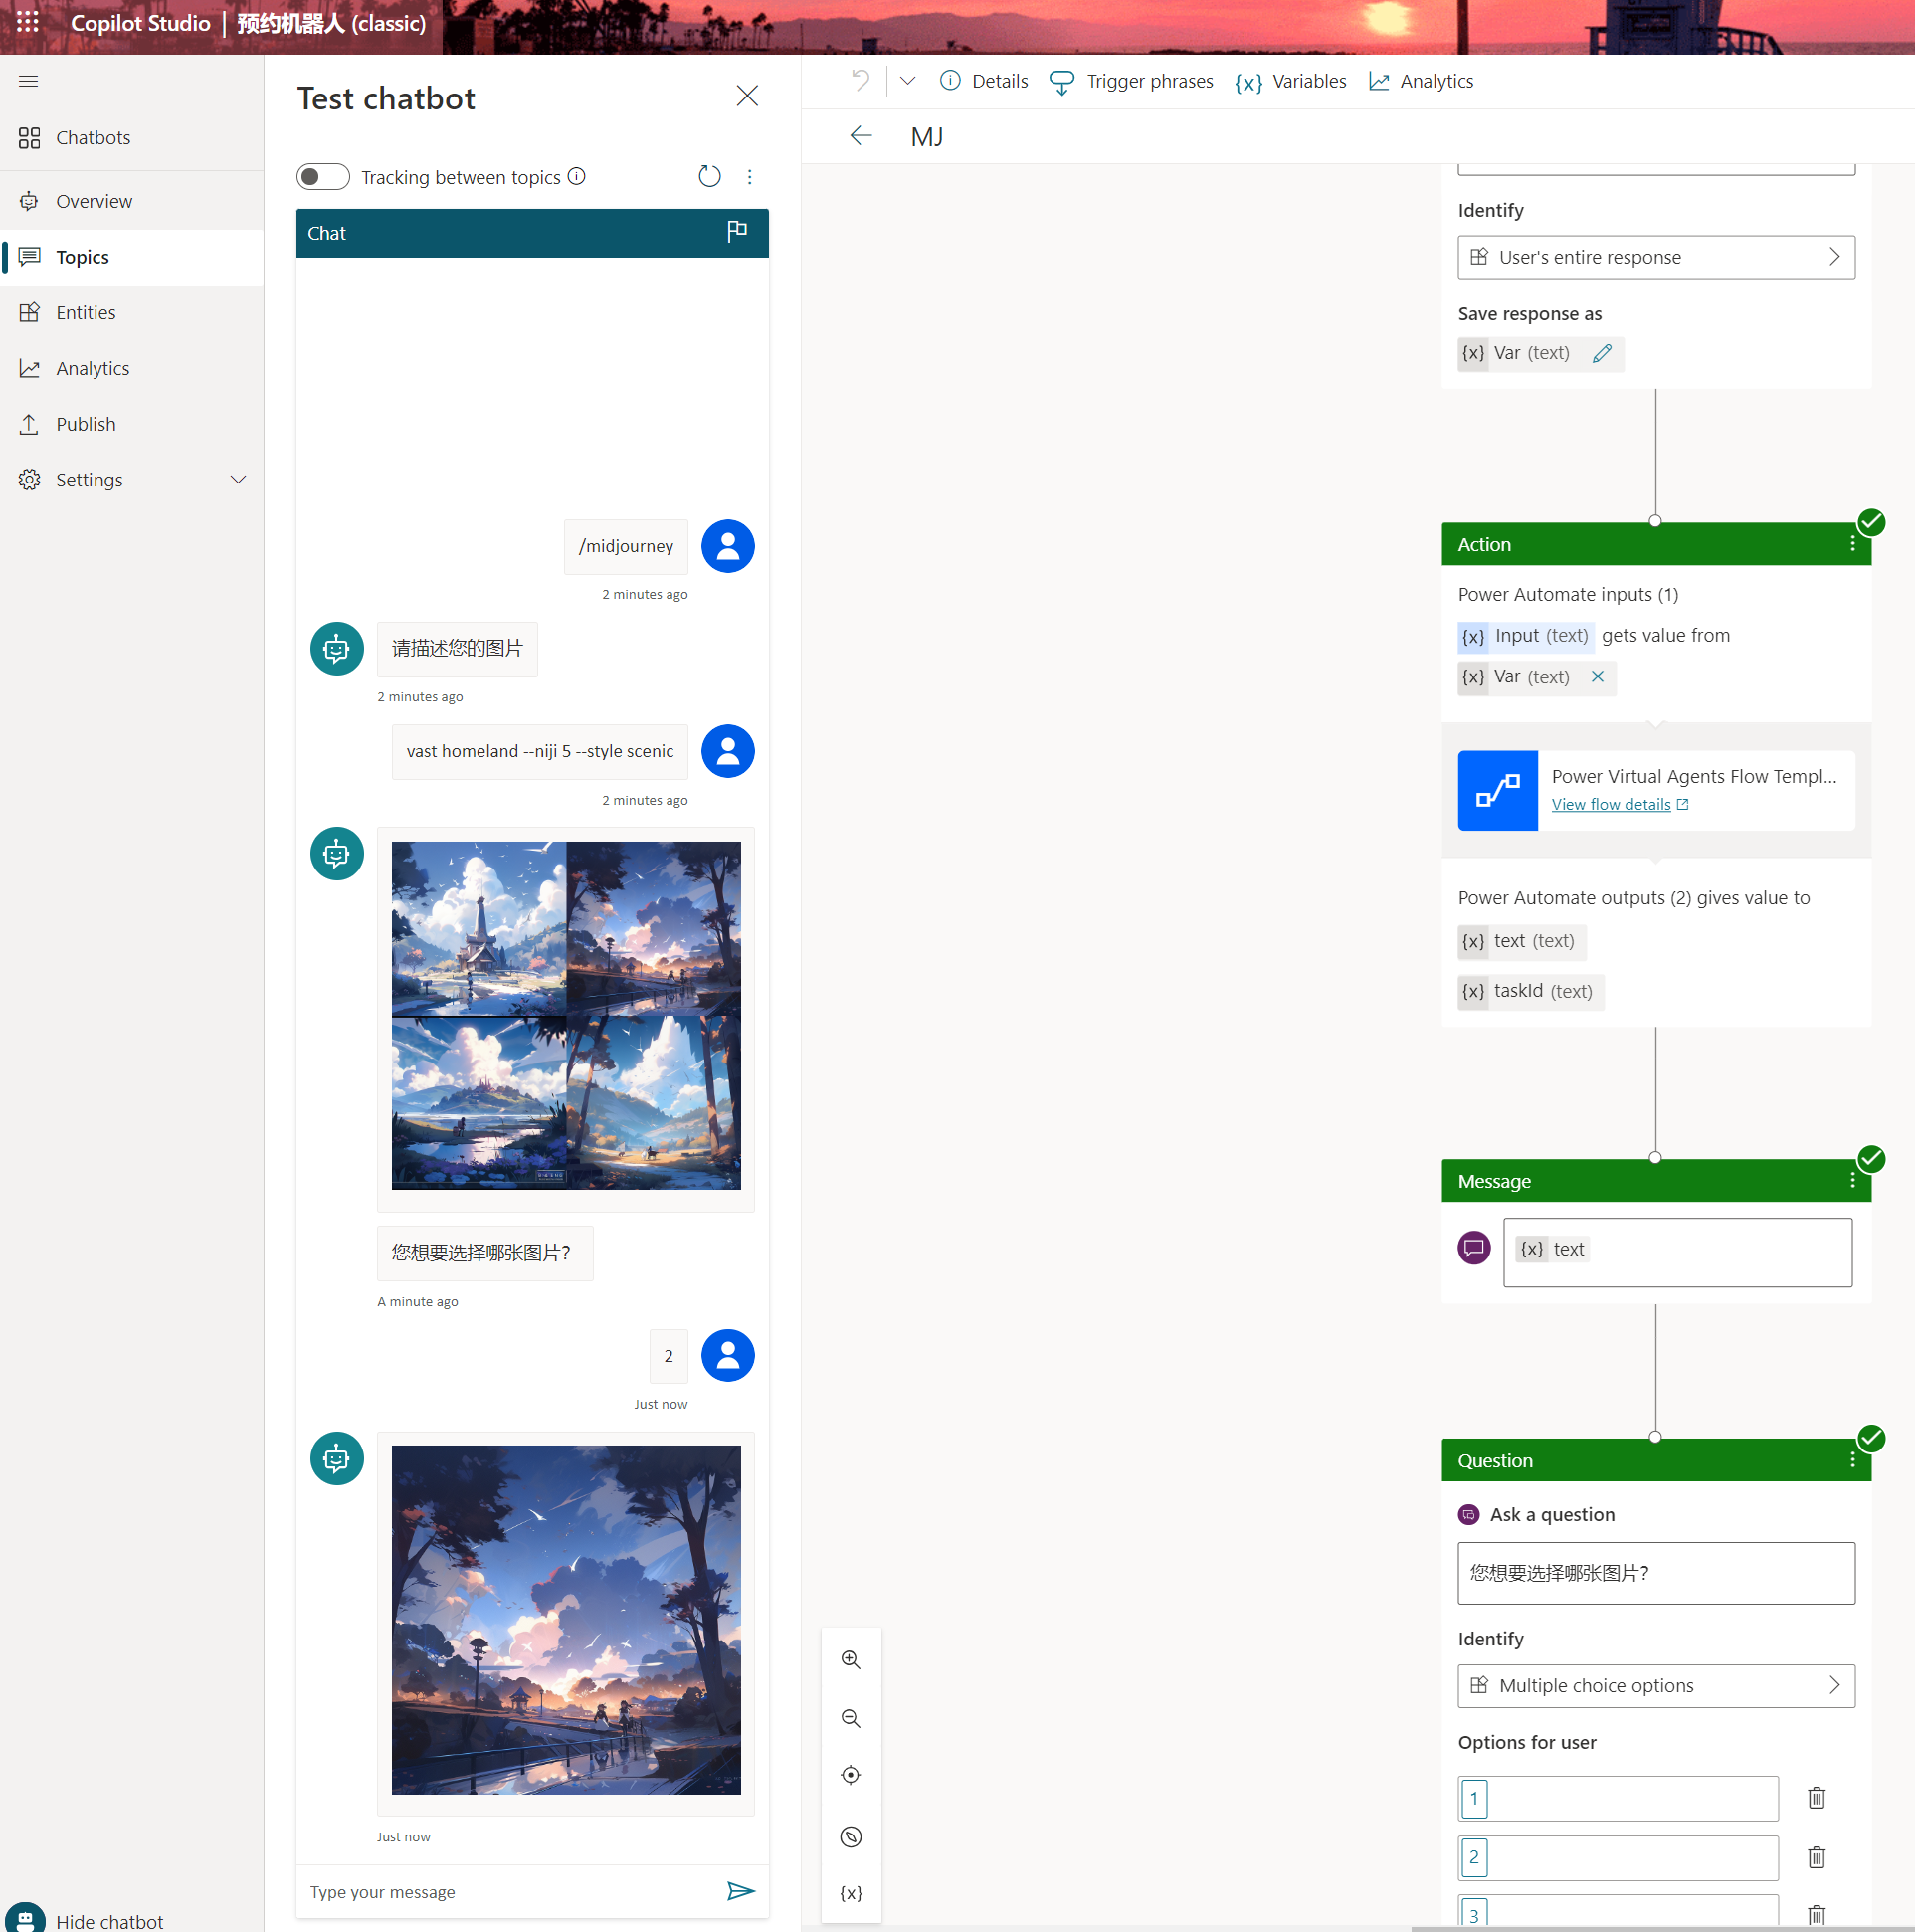
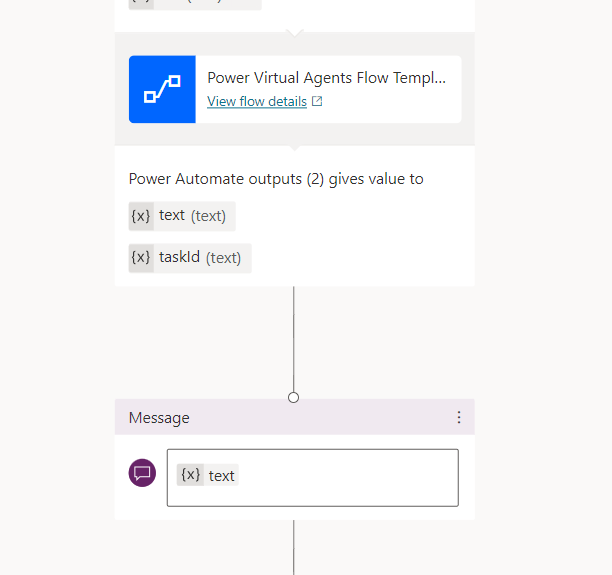
之后回到Copilot Studio,通过Message来显示返回的图片(这时候的返回的图片是4个图片拼在一起的),taskId后续会在选择具体图片中会用到。
调用Question模块,Identify选择Multiple choice options,再将用户的选择保存在option变量里,具体如下图所示,

接着就是具体选图的流程,毕竟复杂但是操作都差不多,就不复述了,具体步骤见下图,
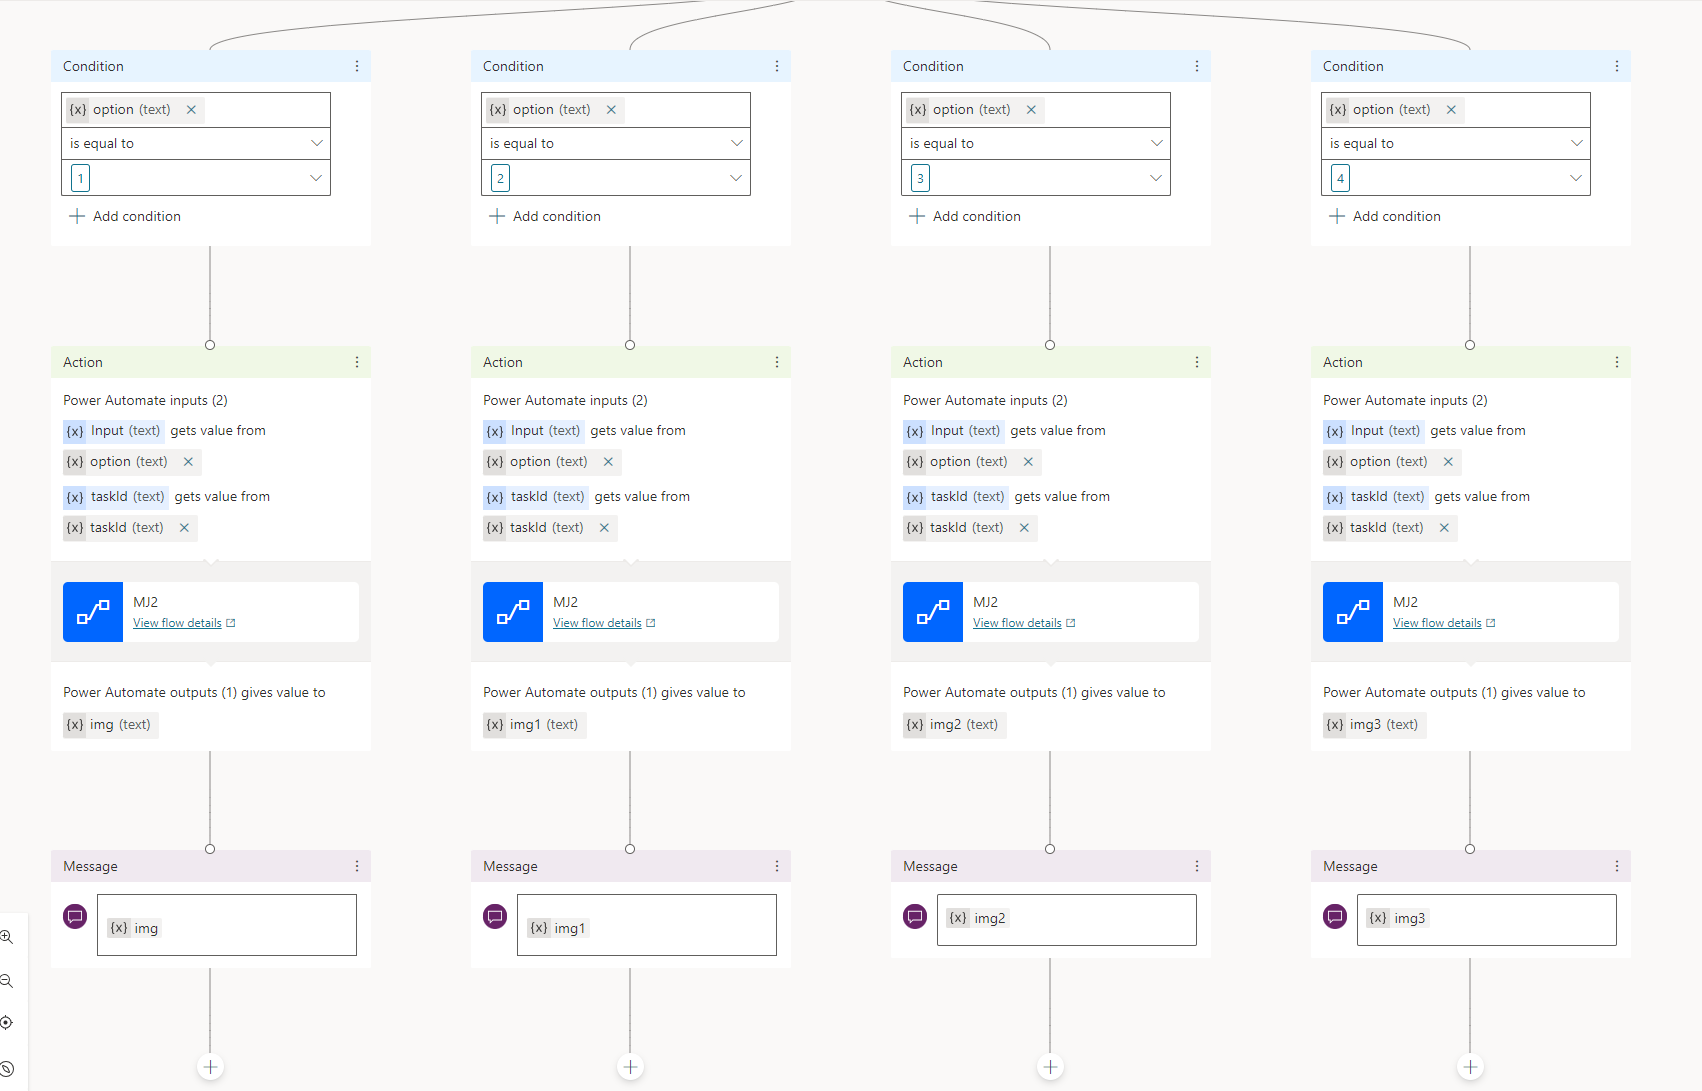
在其中还是 需要创建一条新的流,
{
    "type": "object",
    "properties": {
        "code": {
            "type": "integer"
        },
        "description": {
            "type": "string"
        },
        "result": {
            "type": "string"
        },
        "properties": {
            "type": "object",
            "properties": {
                "discordInstanceId": {
                    "type": "string"
                }
            }
        }
    }
}
然后再获取图片返回Copilot Studio,
最终效果